Click on Pictures to View

To view a larger version of an image within a post, just click on the picture you want to view :)

Friday, March 3, 2023

Cisco 9120 Access Points Not Joining Catalyst WLC 9800

 So a migration from good old Cisco AirOS 5508 redundant wireless LAN controllers to the brand spanking new (yikes!) Catalyst 9800-40 chassis in an SSO design (HA basically).


In running Amsterdam 17.3.4, we were rapidly replacing our nearly EOL 2602s, 2702s, 3702s, 1572s and even 2802s as these will lose support on the 9800 controller with the next major release version of firmware.


However we noticed that some 9120s were unexpectedly not joining the WLC as we got new ones in.  There were all different versions from the factory - this version (VID) can be confirmed on the label on the access point itself, will be small print in the upper right corner - V01, V03, V05, V07 and the like.  You can also check with show inventory command if you have CLI access.


We had gotten a box of V07 and after hanging all of them was when we realized none of them would join which was totally unexpected, hence finding the field notice 72424.


It turned out there was a bug reported and in the Cisco tool where certain versions of APs and V07 APs would not join if they joined after a certain date in December 2022 or January 2023.


Of course, however, after doing an emergency code upgrade to the recommended 17.3.6 version, all of the 9120s then happily joined, and we lost all remaining 3702s and 1572s to stuck in Downloading and or failing to join due to a DTLS - another bug with a workaround.


Workaround (listed to be performed before upgrading to 17.3.6...lol) is as follows:

disable NTP on the controller > change date on WLC to recent enough date before Dec. 4, 2022 > wait for APs to finish downloading and able to join the controller > reboot any APs failing to join after upgrade completes > enable NTP again once all APs are joined again.

I am still in the process of testing if this workaround, listed to be done before you upgrade, on a notice for issues after upgrade, applies or not.  Otherwise looks like in the second Field Notice there might be additional AP service packs available for 17.3.6 (or relevant/related others with similar problem) to resolve that issue if already installed.


You'll need a Cisco account to view in the bug tool links I believe, FYI.


Sources:

https://community.cisco.com/t5/wireless/9130axi-access-point-not-able-to-join-9800-40-wlc/td-p/4698344

https://community.cisco.com/t5/wireless/new-aps-manufactured-after-sept-2022-can-t-join-older-codes/td-p/4675090

https://www.cisco.com/c/en/us/support/docs/field-notices/724/fn72424.html

https://bst.cloudapps.cisco.com/bugsearch/bug/CSCwd80290


https://www.cisco.com/c/en/us/support/docs/wireless/aironet-700-series-access-points/218447-ios-ap-image-download-fails-due-to-expir.html

Friday, November 6, 2020

Fix for Apple TV Stuck in Restore Mode ("Restore tvOS" Fails - system restore image invalid)


DISCLAIMER: So this is one of those "I'm not quite sure how I finally figured it out" solutions, so hopefully I am writing this up the way I actually did it that also got it to actually work.  As usual I'll include my source sites at the bottom.  Apologies for example screenshots & photos not being available for every step!

**This required use of Apple Configurator 2 app on a Mac, and potentially an Apple Developer account to access additional original tvOS files.  I was not able to fix this using Xcode but I was able to help validate it was fixed using Xcode.  EasyFind app is also quite helpful in this case.**

 EQUIPMENT: A Mac Computer, and a cable of type USB-A to USB-C (or possibly USB-C to USB-C cable) is what was successful in my case.  A Belkin Thunderbolt 3 to Thunderbolt 3 cable would also suffice.  Note: the Mac being used only had USB-C ports, so I needed a USB-A to USB-C adapter to connect the AppleTV back to my Mac...


 The Problem - an AppleTV HD (aka 4th gen.) had a rapidly flashing LED light at power on and showed no video.  Upon connecting the AppleTV to a Mac computer, Finder showed that the AppleTV needed to be "restored" and prompted me to do so.  It did not give me an option to specify the restore file like some of the articles online indicated, but had one button and one button only that said Restore; it would proceed to download "the most up to date tvOS restore file", but ultimately the restore effort would fail with an error:

"tvOS cannot be restored on this device. - The System restore image is invalid. [ConfigurationUtilityKit.error - 0x2BD (701)]"


Turned out whatever file it was looking to or supposedly downloading from Apple online and then looking to as its restore file was corrupt.

Also to complicate matters, Apple Configurator 2 showed the device was not "booted".


The Solution -  Using EasyFind, search for "Only Files, All Words, Invisible Files & Folders" for .ipsw (no * wildcard) in your local user username profile folder.  Making note of the file and folder names, locations and timestamps, then move any existing .ipsw files in the ACUDownloadFileOperation folder and or in any subfolders out to the Desktop.

Next, in Apple Configurator, go to the menu bar dropdown menu and select:

"Actions" -> "Advanced" -> "Revive Device." 

 Once the "revive" process finishes, my AppleTV showed it was in state "booted" with the seemingly appropriate tvOS version based on the EasyFind search I mention next.  The LED was still rapidly flashing and the Apple TV was still showing as needing to be Restored / in Restore mode but was now "booted".

Go back to EasyFind and rerun the search with the same criteria.  There should a new instance of the .ipsw file with a new timestamp.  Select to highlight the file and choose Reveal in Finder option button in EasyFind.

Back in Apple Configurator app, drag the .ipsw file from Finder to the Apple TV device's Info tab - I believe it was the only tab that would allow me to drag and drop the file to - this should then initiate a Restore and install of tvOS with the freshly downloaded file.

After the restore and install process finished, the AppleTV preview showed a setup screen and displayed as "Booted" still.

The AppleTV needed one more thing to be able to be finished apparently and that involved steps usually reserved for company deployment.  But it worked - so click Prepare button in the window menu of Apple Configurator.  The options I used were as follows on the screenshots -

1) Manual Configuration, Supervise devices, Allow devices to pair with other computers


2) Do not enroll in MDM

 
3) Skip Apple ID sign in

4) Input any info for organization information


5) Generate a new supervision identity (including screenshot of Apple's user guide info on this)


6) Show all steps with all checkboxes checked


Then authenticate with your Mac login creds to allow making changes to your Certificate Trust Settings.

AppleTV will then restart and display in Apple Configurator with the AppleTV app screen on the preview image, show the about and tech spec info, as well as an Organization section.


I then booted the AppleTV like regular to an external monitor/screen and it booted to the setup screen.  I had a new remote that I paired to it by following the instructions (hold Menu & Volume up button simultaneously, if I recall, while holding the remote a few inches away from the AppleTV unit).  The AppleTV then prompted for regular setup.


If you have issues with the file being automatically downloaded, you can try downloading the latest restore file on the Apple Developer website to then drag and drop to the Apple Configurator window - currently there is a file compatible with the AppleTV HD (ie 4th gen.) and above, filename AppleTV5,3_14.2_18K57_Restore.ipsw: https://developer.apple.com/download/release/


Sources:

"Revive an iPhone, iPade, or Apple TV in Apple Configurator 2": https://support.apple.com/guide/apple-configurator-2/revive-an-iphone-ipad-or-apple-tv-cad367dc4593/mac

 "Restore Your AppleTV": https://support.apple.com/en-us/HT203028

"The software was corrupted during download": https://discussions.apple.com/thread/250953112

 "If you can't update or restore your iPhone, iPade or iPod touch - Apple Support: https://support.apple.com/en-us/HT201263

"Identify your AppleTV Model":  https://support.apple.com/en-us/HT200008

 "Apple Configurator error code - MDKZipUtilitiesErrorDomain error 1" (Shout out to Bruce4051's post from Oct. 3, 2013!): https://community.spiceworks.com/topic/385692-apple-configurator-error-code-mdkziputilitieserrordomain-error-1

Wednesday, December 12, 2018

Enable or Disable HP Laptop LAN/WLAN Switching in BIOS via PowerShell

So HP laptops, at least, usually have a feature described as LAN/WLAN switching.  This essentially disables the wireless when a LAN cable is attached to the laptop, and enables the wireless when the LAN cable is disconnected.

This feature can help avoid laptops needing both LAN & wireless IP addresses, and since LAN speeds are typically faster so forcing the machine to use the wire instead of wireless is also a benefit.

You can boot into the BIOS and look for the feature in order to enable it, which can get cumbersome and tricky if you are using Windows 10.

This PowerShell script checks the HP BIOS for feature "LAN/WLAN Switching", verifies if it is already enabled, or enables LAN/WLAN switching if it is not already enabled.

You can type this in a text document, then save it as a powershell instead of text file, e.g. lanwlan.ps1


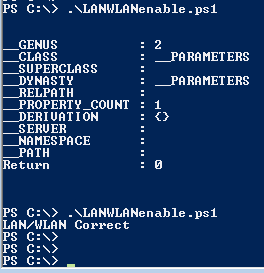
Then simply run the PowerShell script twice (first to change, then to confirm) and rebooted the machine once.


There was an instance, however, where I needed both the wireless and wire to work simultaneously for my test laptop so that I could relatively remotely run a packet capture (so the laptop's LAN was connected to a SPAN port, and its wireless needed to be enabled so I could RDP to a valid IP on the laptop in the tiny network closet).

I simply reversed the script to choose "If the LAN/WLAN switching is Disabled, return Correct, otherwise Disable the feature."


I ran the script and rebooted the test laptop and voila, the feature was disabled without going into the BIOS itself.


Scripts below.


Disable_LANWLANAutoSwitching.ps1

$Interface = Get-WmiObject HP_BIOSEnumeration -Namespace "ROOT\HP\InstrumentedBIOS"  | where Name -eq "LAN / WLAN Auto Switching" | Select value
If ($Interface.value -eq "*Disabled,Enabled")
{
$Interface
}
Else
{
$Setting = Get-WmiObject -Namespace "ROOT\HP\InstrumentedBIOS" -Class HP_BIOSSettingInterface
$Setting.SetBIOSSetting("LAN / WLAN Auto Switching","Disabled","")
}


Enable_LANWLANAutoSwitching.ps1

$Interface = Get-WmiObject HP_BIOSEnumeration -Namespace "ROOT\HP\InstrumentedBIOS"  | where Name -eq "LAN / WLAN Auto Switching" | Select value
If ($Interface.value -eq "Disabled,*Enabled")
{
$Interface
}
Else
{
$Setting = Get-WmiObject -Namespace "ROOT\HP\InstrumentedBIOS" -Class HP_BIOSSettingInterface
$Setting.SetBIOSSetting("LAN / WLAN Auto Switching","Enabled","")
}


For legacy versions:


LANWLANdisable.ps1

$lan = gwmi HP_BIOSSetting -Namespace "root\HP\InstrumentedBIOS"  | where {$_.name -eq "LAN/WLAN Switching"} | Select value
If ($lan.value -eq " *Disable, Enable")
{
"LAN/WLAN Correct"
}
Else
{
$s = gwmi -class hp_biossettinginterface -Namespace "root\hp\instrumentedbios"
$s.SetBIOSSetting("LAN/WLAN Switching","Disable","")
}


LANWLANenable.ps1


$lan = gwmi HP_BIOSSetting -Namespace "root\HP\InstrumentedBIOS"  | where {$_.name -eq "LAN/WLAN Switching"} | Select value
If ($lan.value -eq " Disable, *Enable")
{
"LAN/WLAN Correct"
}
Else
{
$s = gwmi -class hp_biossettinginterface -Namespace "root\hp\instrumentedbios"
$s.SetBIOSSetting("LAN/WLAN Switching","Enable","")
}

Tuesday, November 27, 2018

Comparing AD Group Member Count & SCCM Collection Membership


Recently there was some concern that our SCCM 2012 R2 collections that referenced/queried Active Directory security groups weren't updating or syncing properly.

A simple way I wanted to confirm if this was the case, was to compare the number of assets in a particular AD group with its corresponding SCCM collection.

After some quick research, I discovered a relatively easy PowerShell method to count the number of members in the Active Directory group.


I opened an elevated Powershell window (aka, right-click & Run As Admin...) and ran the following:

PS C:\Windows\system32>  $users = Get-ADGroupMember -Identity 'ADGroupName'
PS C:\Windows\system32>  $users.Count
160
PS C:\Windows\system32>  $users |Export-Csv -path C:\temp\psexport.csv


The first line sets the $users variable.
The second line returns the member count.
The third line exports the members & info as a CSV to the path specified.


So I got the count of members in the AD group, which was 160, and went ahead and exported the information to a CSV file to open within Excel.

Next, I opened the SCCM collection to show the members (can also right click the collection name and click Show Members).  The collection was showing a count of 106 members in the collection information.

On the device membership list screen, do Ctrl + A to select all members, then Ctrl + C to copy the list.
Last, paste the copied data into Excel.


Finally, I used the "Ablebits Data Merge Two Tables" wizard tool to compare the two excel spreadsheets using the computer name as the key.

I had the SCCM info as the main table, and the AD info as the lookup table.


Using the tool's result column (MTW Status), I looked for all non-matching entries - i.e. entries that are in AD group that are not in the SCCM collection.

I found 54 assets that are in the AD group but do not show up in the SCCM collection.  In fact, these assets did not appear to be in SCCM at all.

Further investigation revealed these computers to be dead accounts in Active Directory, so they were inactive altogether and could actually be deleted from Active Directory since they were either disposed or no longer on the domain, etc.

In the end, we proved that SCCM was updating its membership based on the active computer accounts in the AD security group, as expected.


Sources:


Computer in AD Not Appearing in SCCM:
https://social.technet.microsoft.com/Forums/en-US/5923a17c-3994-4bd0-8811-ce2f2e8593f0/computer-in-ad-not-appearing-in-sccm?forum=configmanagerdeployment


How To Export a Collection to CSV in SCCM 2012:
https://community.spiceworks.com/topic/259637-how-to-export-a-collection-to-csv-in-sccm-2012


Powershell Count Members of an AD Group:
http://blogs.microsoft.co.il/skepper/2016/05/31/powershell-count-members-of-a-ad-group/


Ablebits Data Merge Two Tables in Excel Tool:
https://www.ablebits.com/excel-lookup-tables/index.php


Wednesday, November 14, 2018

Set Outlook as Default Mail Client on a Mac

The following instructions are to update the default mail client that opens when trying to use certain links on a Mac, from Apple Mail to Outlook, without needing to add an account to Apple Mail for accessing the Mail preferences.  I tested it with Outlook 2016 for Mac successfully.

There is a Microsoft utility that allows users to make Microsoft Outlook their default mail application.

Scenario:  The user desires Outlook to open a new email whenever they click on a mailto: link in an email or website.  Clicking on a mailto: link opens the default email application and Outlook is not the default mail application, until you set it as such.

Steps:

1)  Direct download the SetDefaultMailApp.zip file here:
https://msdnshared.blob.core.windows.net/media/2017/12/SetDefaultMailApp.zip

2)  Double click the downloaded .zip file to expand it and reveal the SetDefaultMailApp icon

3)  Double click the SetDefaultMailApp icon, and select "Open" to proceed through any security warnings

4)  In the Default Mail Application window, click the dropdown menu and choose the "com.microsoft.outlook" option, then click the "Make Default" button

5)  Once set, quit the Default Mail Application from the top menu bar or by pressing the Command + Q keys at the same time


Sources:

Mac Outloook Support Utilities -
https://blogs.technet.microsoft.com/office_for_mac_support_team_blog/2017/08/10/mac-outlook-support-utilities/

Delete Specific Auto-Suggested URLs in Chrome

For whatever reason, it started happening that whenever I wanted to navigate to cisco.com in Chrome, it would auto-suggest and auto-populate a sub-address that went to a Cisco QoS PDF page.

Super annoying.

I was able to delete that specific auto-suggestion by doing this:

1)  I typed in cisco.com but didn't press enter - I just let the auto-suggestion populate in the bar.

2)  Then, I arrowed down (and or back up if needed) to highlight select the URL it kept defaulting to.

3)  Finally, I pressed Shift + Delete keys at the same time to delete the populated auto-suggested URL.


Last I tested by trying to navigate to cisco.com, and was able to go directly to the Cisco home page.

The process should be the same for FireFox, according to the source article below.


Sources:

How to erase specific autosuggested urls from Chrome, FireFox, and IE -
https://www.pcworld.com/article/2098431/browsers/how-to-erase-specific-autosuggested-urls-from-chrome-firefox-and-ie.html

Thursday, October 4, 2018

Cisco 3850 Layer 3 Egress WAN QoS

So I've been learning a lot about Quality of Service mechanisms and configuration lately.
One thing I've learned is to know how to access the Configuration Guide for the equipment I'm working with.  Many devices and code levels have different defaults and configuration statements for QoS, so being able to look up a particular gear's QoS configuration guide has proven essential.

For instance, here's the link to Cisco switches, where you can filter down to your model and software type for the relevent configuration guide:
https://www.cisco.com/c/en/us/support/switches/index.html

Another example, below is the link to the Catalyst 3850 series switch configuration guides and other documentation:

https://www.cisco.com/c/en/us/support/switches/catalyst-3850-series-switches/products-installation-and-configuration-guides-list.html

Now in the QoS e-course I'm watching from Cisco, they do emphasize to refer to switch documentation, configuration guide & release notes to know what QoS commands are supported.
They also went over some example caveats (of the Catalyst 3550 series at least) that I thought were interesting.  One caveat included: on Egress, you can only attach a policy-map that matches DSCP.

So, now, in configuring QoS on a Catalyst 3850, we configure the class-map, then the policy-map, then apply the policy-map to an interface.

See example Layer 3 Egress/WAN QoS policy configuration below:

1.  Configure class-map first (class-map matches the tags)


        class-map match-any VOICE-RTP              
              match dscp ef
        class-map match-any VIDEO-INTERACTIVE
              match dscp af41
              match dscp cs4
        class-map match-any CALL-SIGNALING
              match ip dscp cs3
              match ip dscp af31        
         class-map match-any SCAVENGER
              match ip dscp cs1

2.  Then Policy-map allocates percentage of bandwidth & reservations based on class
policy-map WAN-PRIMARY
        class VOICE-RTP
              priority level 1 percent 10

        class VIDEO-INTERACTIVE
              priority level 2 percent 20

        class CALL-SIGNALING
              bandwidth percent 5

        class SCAVENGER
              bandwidth percent 10

        class class-default
              shape average 9500000000***

Then Service-policy applies policy-map to interface

interface Gi1/0/1
     service-policy output WAN-PRIMARY


Note:
***shape average should be lowered by bandwidth minus 5 percent, in bits
for 1Gb it would be 950Mb 
the five percent was rule of thumb for 100Mb 
so took 1Gbps knocked it down to 950Mb 
for gig it's 950 million = 950,000,000 bits, 
and 95Mb shape average for 100Mb circuit


Bits Per Second Cheatsheet:


  • 1 Kbps = 1,000 bps    (one thousand bits per second)
  • 100 Kbps = 100,000 bps    (100 thousand)
  • 1 Mbps = 1,000,000 bps    (1 million)
  • 100 Mbps = 100,000,000 bps    (100 million)
  • 1 Gbps = 1,000,000,000 bps      (1 billion)
  • 10 Gbps = 10,000,000,000 bps    (10 billion)


Sources:


https://www.cisco.com/c/en/us/td/docs/switches/lan/catalyst3850/software/release/3e/qos/configuration_guide/b_qos_3e_3850_cg/b_qos_3e_3850_cg_chapter_011.pdf


Friday, August 24, 2018

Cisco 3850 Software Recovery via USB

Recently I have had to recover different Cisco Catalyst 3850 switches due to failed software installs or failed auto-upgrades in the stack, or unintentionally installing the wrong code on the wrong switch model, or having corrupted or missing packages.conf directory files :-/

Some of the switches were seemingly bricked from bad code, while others were stuck at the ROMMON switch: prompt, and others still cycling in a (re)boot loop.

I was able to recover these using a USB thumb drive and following the Cisco 3850 Recovery Techniques documentation (see source references at the bottom of this post for links)

The steps I completed are as follows:

1)  First I needed a USB flash drive onto which I could store a copy of known working code version, so that I could boot the switch off the USB, and later copy the image from the USB to the switch's internal flash.  I ended up using a 128GB SanDisk Cruzer USB drive that I had in my bag, and I downloaded & copied the appropriate .bin file from Cisco to the USB.

2)  Second, I needed the switch to be at the switch: prompt.  If it wasn't already, I pressed the Mode button for about 10 seconds after powering on the switch to get it to the ROMMON mode.

3)  Next, I looked for the USB drive in the switch directory, and verified the .bin file was there.

switch: dir     usbflash0:
Directory of usbflash0:/

          1  drw-  0          SanDiskSecureAccess
          4  -rw-  16024600   RunSanDiskSecureAccess_Win.exe
          9  -rw-  328157104  cat3k_caa-universalk9.SPA.03.07.04.E.152-3.E4.bin


125081878528 bytes available (347471872 bytes used)


4)  Then I booted the switch to the image on the USB drive, which loads into Bundle mode.

switch: boot usbflash0:cat3k_caa-universalk9.SPA.03.07.04.E.152-3.E4.bin
Reading full image into memory..................................................
................................................................................
................................................................................
................................................................................
..........................done

    [Output Omitted]

Press RETURN to get started!

5)  Once booted in Bundle mode, I looked for the packages.conf file in the flash directory.

Switch-C3850-24XS#dir flash:
Directory of flash:/

39842  -rw-     2097152   May 1 2018 11:39:33 -05:00  nvram_config
39843  -rw-    81992100  Jul 11 2017 00:13:21 -05:00  cat3k_caa-base.SPA.03.07.04E.pkg
39844  -rw-     5667516  Jul 11 2017 00:13:22 -05:00  cat3k_caa-drivers.SPA.03.07.04E.pkg
39845  -rw-    36656136  Jul 11 2017 00:13:21 -05:00  cat3k_caa-infra.SPA.03.07.04E.pkg
39846  -rw-    46349632  Jul 11 2017 00:13:22 -05:00  cat3k_caa-iosd-universalk9.SPA.152-3.E4.pkg
39847  -rw-    28904332  Jul 11 2017 00:13:21 -05:00  cat3k_caa-platform.SPA.03.07.04E.pkg
39848  -rw-   128582464  Jul 11 2017 00:13:22 -05:00  cat3k_caa-wcm.SPA.10.3.141.0.pkg
39854  -rw-        1237  Apr 30 2018 17:09:15 -05:00  packages.conf
39850  drwx        4096  Jul 11 2017 00:26:36 -05:00  virtual-instance
71713  drwx        4096   May 1 2018 11:39:05 -05:00  dc_profile_dir
71715  drwx        4096  Jul 11 2017 00:29:39 -05:00  wnweb_store
39851  -rw-        1096   May 1 2018 11:39:28 -05:00  vlan.dat
39852  -rw-   305292424  Apr 30 2018 15:14:04 -05:00  cat3k_caa-universalk9.SPA.03.06.08.E.152-2.E8.bin
39853  -rw-        1236  Jul 11 2017 00:13:31 -05:00  packages.conf.00-
39855  -rw-    83298720  Apr 30 2018 17:09:11 -05:00  cat3k_caa-base.SPA.03.06.08E.pkg
39856  -rw-     3949504  Apr 30 2018 17:09:11 -05:00  cat3k_caa-drivers.SPA.03.06.08E.pkg
39857  -rw-    33811696  Apr 30 2018 17:09:11 -05:00  cat3k_caa-infra.SPA.03.06.08E.pkg
39858  -rw-    43109956  Apr 30 2018 17:09:11 -05:00  cat3k_caa-iosd-universalk9.SPA.152-2.E8.pkg
39859  -rw-    28447888  Apr 30 2018 17:09:11 -05:00  cat3k_caa-platform.SPA.03.06.08E.pkg
39860  -rw-   112669764  Apr 30 2018 17:09:11 -05:00  cat3k_caa-wcm.SPA.10.2.180.0.pkg


3463024640 bytes total (2514513920 bytes free)

6)  I went ahead and copied and renamed the current packages.conf file in flash to packages.conf.badop


Switch-3850-24XS#copy flash:packages.conf flash:packages.conf.badop
Destination filename [packages.conf.badop]?
Copy in progress...C

1237 bytes copied in 0.010 secs (123700 bytes/sec)

7)  Checked flash directory again to confirm the two packages files were present in flash, then deleted the original packages.conf file (also saw corrupt packages.conf.00-)

Switch-3850-24XS#dir flash:
Directory of flash:/

39842  -rw-     2097152   May 1 2018 11:39:33 -05:00  nvram_config
39843  -rw-    81992100  Jul 11 2017 00:13:21 -05:00  cat3k_caa-base.SPA.03.07.04E.pkg
39844  -rw-     5667516  Jul 11 2017 00:13:22 -05:00  cat3k_caa-drivers.SPA.03.07.04E.pkg
39845  -rw-    36656136  Jul 11 2017 00:13:21 -05:00  cat3k_caa-infra.SPA.03.07.04E.pkg
39846  -rw-    46349632  Jul 11 2017 00:13:22 -05:00  cat3k_caa-iosd-universalk9.SPA.152-3.E4.pkg
39847  -rw-    28904332  Jul 11 2017 00:13:21 -05:00  cat3k_caa-platform.SPA.03.07.04E.pkg
39848  -rw-   128582464  Jul 11 2017 00:13:22 -05:00  cat3k_caa-wcm.SPA.10.3.141.0.pkg
39854  -rw-        1237  Apr 30 2018 17:09:15 -05:00  packages.conf
39850  drwx        4096  Jul 11 2017 00:26:36 -05:00  virtual-instance
71713  drwx        4096   May 1 2018 11:39:05 -05:00  dc_profile_dir
71715  drwx        4096  Jul 11 2017 00:29:39 -05:00  wnweb_store
39851  -rw-        1096   May 1 2018 11:39:28 -05:00  vlan.dat
39852  -rw-   305292424  Apr 30 2018 15:14:04 -05:00  cat3k_caa-universalk9.SPA.03.06.08.E.152-2.E8.bin
39853  -rw-        1236  Jul 11 2017 00:13:31 -05:00  packages.conf.00-
39855  -rw-    83298720  Apr 30 2018 17:09:11 -05:00  cat3k_caa-base.SPA.03.06.08E.pkg
39856  -rw-     3949504  Apr 30 2018 17:09:11 -05:00  cat3k_caa-drivers.SPA.03.06.08E.pkg
39857  -rw-    33811696  Apr 30 2018 17:09:11 -05:00  cat3k_caa-infra.SPA.03.06.08E.pkg
39858  -rw-    43109956  Apr 30 2018 17:09:11 -05:00  cat3k_caa-iosd-universalk9.SPA.152-2.E8.pkg
39859  -rw-    28447888  Apr 30 2018 17:09:11 -05:00  cat3k_caa-platform.SPA.03.06.08E.pkg
39860  -rw-   112669764  Apr 30 2018 17:09:11 -05:00  cat3k_caa-wcm.SPA.10.2.180.0.pkg
39849  -rw-        1237   May 1 2018 11:43:04 -05:00  packages.conf.badop


3463024640 bytes total (2514509824 bytes free)

Switch-3850-24XS#del flash:packages.conf
Delete filename [packages.conf]?
Delete flash:/packages.conf? [confirm]
Switch-3850-24XS#

8)  Next, I expanded the bundle running on the switch to create a new packages.conf file in flash.


Switch-3850-24XS#software expand running switch 1 to flash:
Preparing expand operation ...
[1]: Expanding the running bundle
[1]: Copying package files
[1]: Package files copied

[1]: Finished expanding the running bundle


9)  After that I verified the boot variables.

Switch-3850-24XS#show boot
---------------------------
Switch 1
---------------------------
Current Boot Variables:
BOOT variable does not exist

Boot Variables on next reload:
BOOT variable = flash:packages.conf
Allow Dev Key = yes
Manual Boot = no

Enable Break = no

10)  Lastly, initiated a reload.

Switch-3850-24XS#reload
Reload command is being issued on Active unit, this will reload the whole stack

Proceed with reload? [confirm]

11)  After the switch reloaded, it came up as normal, and I was able to verify the version and mode of the software on the switch, followed by a software clean to remove old files of code from flash.

Switch-3850-24XS#show version

    [Output Omitted]

Switch Ports Model              SW Version        SW Image              Mode
------ ----- -----              ----------        ----------            ----
*    1 34    WS-C3850-24XS      03.07.04E         cat3k_caa-universalk9 INSTALL


Configuration register is 0x102


Switch-3850-24XS#
Switch-3850-24XS#software clean


SOURCES:

Catalyst 3850 Series Switch Upgrade, Management & Recovery Techniques: